Paver Sealing Process
Seal My Pavers
Brings over 3 decades of hands-on experience to every project. Our job is to get your brick pavers as clean as possible, and that starts with using the right equipment. Our commercial-grade power washing equipment helps get the dirty work done, and reduces the need for harmful chemicals. Beginning the cleaning process starts with a visual inspection of the pavers and noting problem areas that may need extra attention during the washing process.
How We Clean Your Pavers
1. To clean the paver area, we begin using a commercial grade power washer. This operates at 4000 psi and will thoroughly wash the pavers and paver joints without causing damage. We then then check the paver area again to ensure they’re clean and ready.
So how do we get pavers Ultra clean?
2. We use high heat 250° (steam) to clean your pavers. We also utilize walk behind surface cleaners instead of primarily using wands.
3. We then pressure wash around all edges, corners, columns, etc. Pool areas also get detailed around the pool screen, pool coping, hot tubs, and other water features. The wand helps remove paint spots, mortar, grease, and more from the surface of your pavers.
Rinsing The Paver Area
4. After the washing process, we thoroughly rinse all dirt and debris from the paver area. Flushing the mold and algae from the paver joints is a key part of the rinsing process. Once the pavers are cleaned and rinsed thoroughly, we can then see the actual condition of the pavers, remove additional stains, etc.
Algaecide Deep Treatment
5. Some paver systems need our exclusive algaecide deep treatment where the paver joints are flooded with our algaecide/ sodium hypochlorite mixture and allowed to dwell, which will help kill additional mold and weeds between paver joints and under the paver system. This is particularly important step with older paver systems, and thin paver systems that are laid over concrete. After the appropriate dwell time, we then rinse all pavers again with this process.
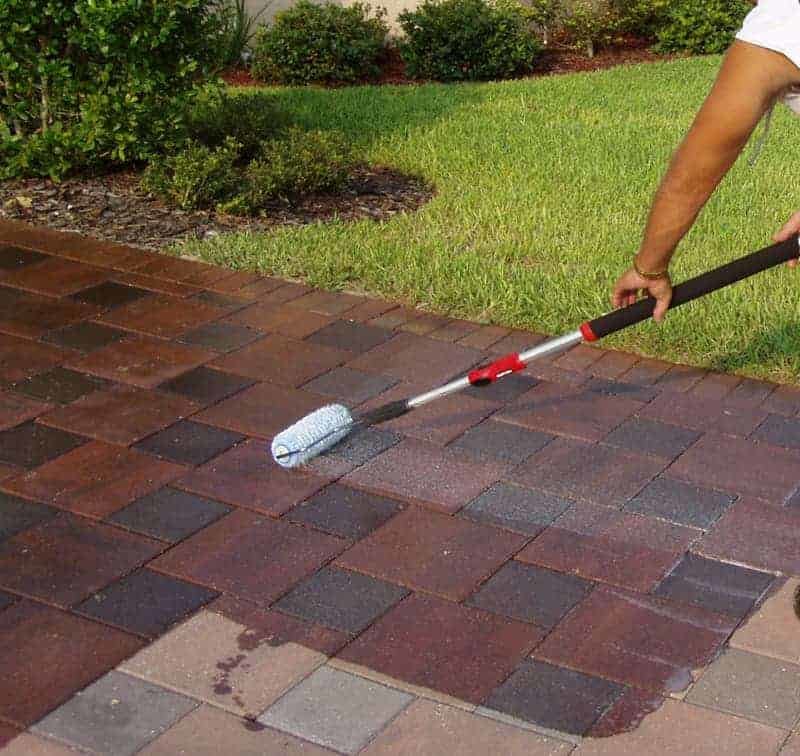
Applying The Sealer
6. The sealer has to be applied by a 1/2 Roller, because of our sealer being an acrylic Sealer it is the best and rolling it on is the only and best way to do it. The paver joints and surface of the pavers are actually flooded with sealer when using a roller and absorbs the paver better, and that the paver itself gets soaked to create the barrier between your pavers and the elements. Getting the sealer deep into the paver helps bring out the true colors of your paver system, and keep them there. Flooding the paver joints locks in the sand, and will help prevent lots of problems with your paver system in the future which is why you don’t want cheap sealer that you just spray on. “DO NOT USE A WATER BASE SEALER” Unless you like asking for trouble!
Finishing The Job
7. After the sealer is applied, we recommend waiting 24 hours to return furniture to patios, and 48 hours before driving vehicles on driveways or paver roadways. Please check out Our Jobs to view our portfolio.